Spring Rest Docs📜 를 통한 문서 자동화
Spring Rest Docs?
Spring Rest Docs는 rest API 를 문서화하는데 도움을 주는 도구입니다.
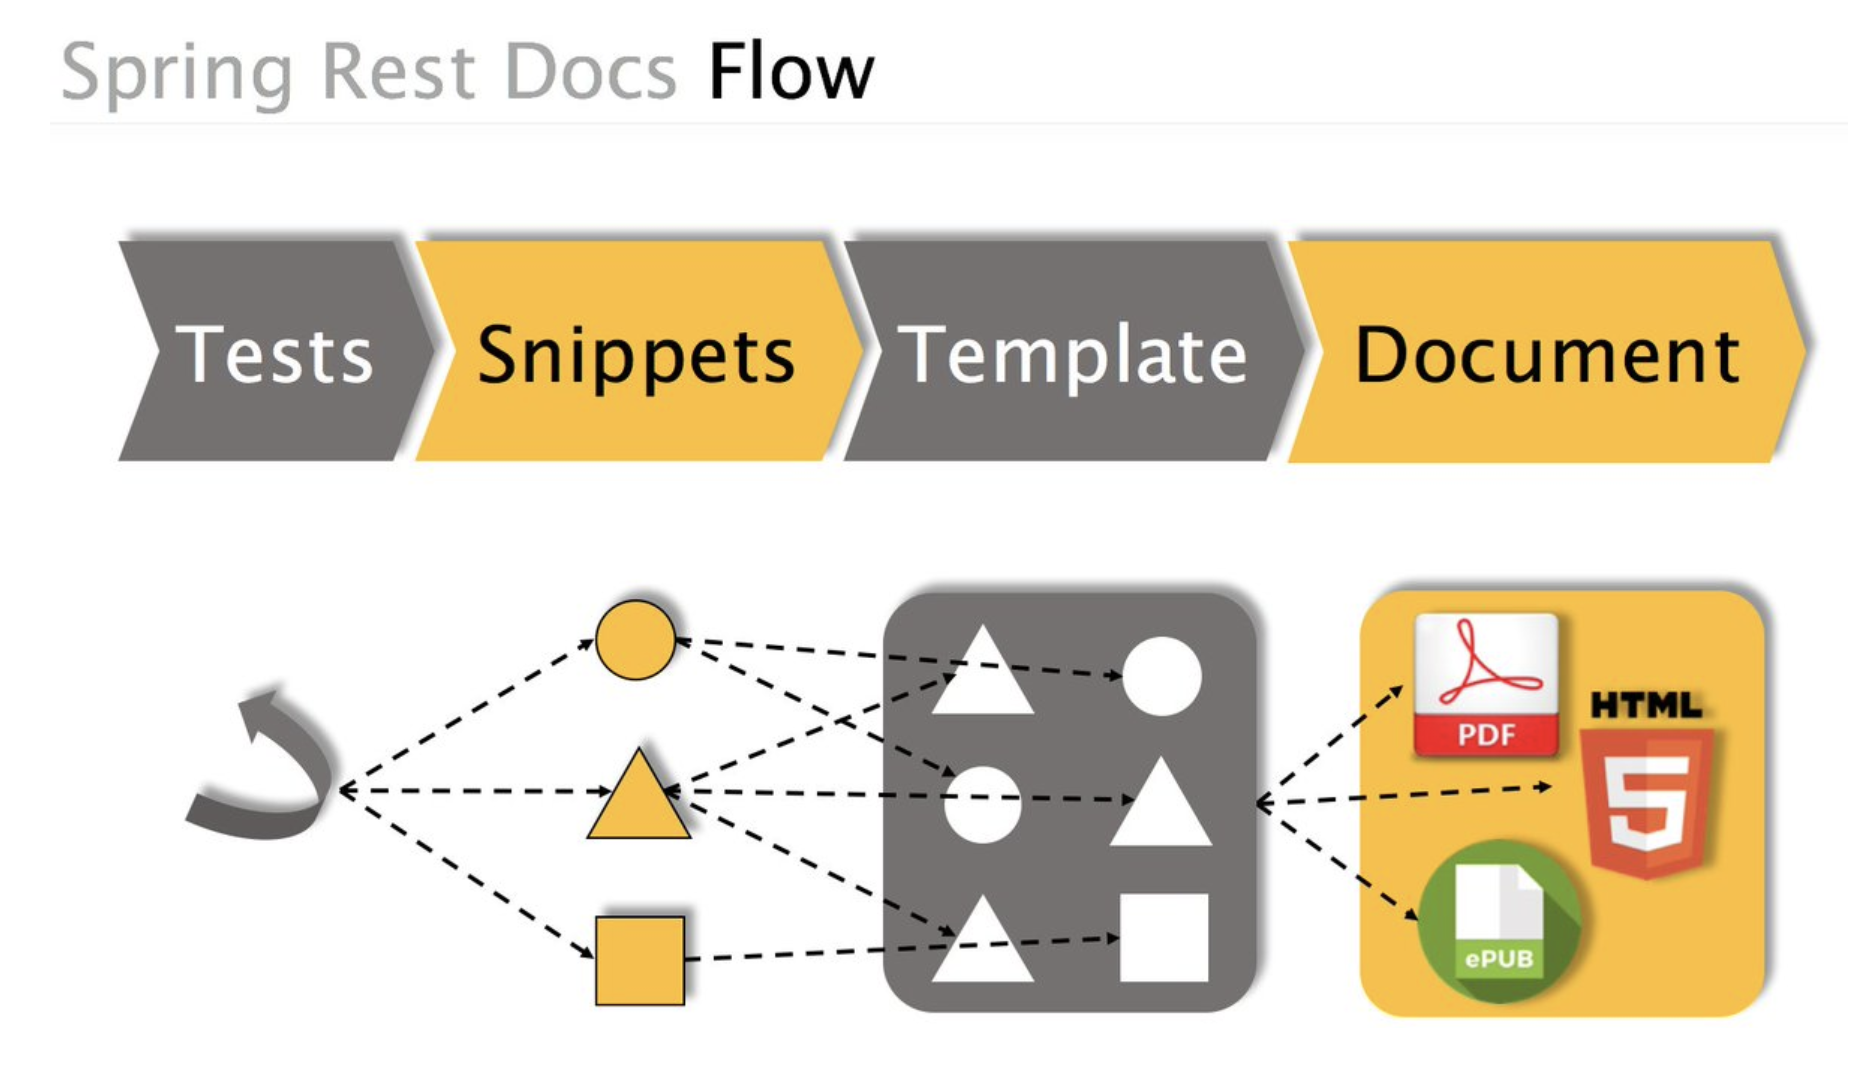
전체적인 흐름은 다음과 같습니다.
1. 테스트 코드를 실행하면 snippets라는 문서에 사용될 조각들이 생성된다.
2. 조각들을 사용자가 의도하는 대로 템플릿에 넣는다.
3. 템플릿을 기준으로 html파일을 생성한다.
이번 포스팅에서는 간단한 예제를 통해 Spring Rest Docs를 이용한 문서 자동화를 익혀보려고 합니다.
준비하기
Spring Rest Docs를 이용하기 위해 몇가지 준비사항이 있습니다.
gradle 의존성주입
plugins {
    ...
    id "org.asciidoctor.convert" version "1.5.9.2"
    ...
}

dependencies {
    ...
    asciidoctor 'org.springframework.restdocs:spring-restdocs-asciidoctor:2.0.4.RELEASE'

      //만약 MockMvc대신 RestAssured를 사용하려면 spring-restdocs-restassured를 주입해주면 됩니다.
    testImplementation 'org.springframework.restdocs:spring-restdocs-mockmvc:2.0.4.RELEASE'
    ...
}

ext {
      //테스트를 통해 생성될 조각(문서화에 필요한)들이 저장될 위치
    snippetsDir = file('build/generated-snippets')
}

test {
    useJUnitPlatform()
    outputs.dir snippetsDir
}

asciidoctor {
    inputs.dir snippetsDir
      //문서가 작성되기전 test가 먼저 실행되도록 합니다.
    dependsOn test
}

bootJar {
    dependsOn asciidoctor
    from ("${asciidoctor.outputDir}/html5") {
        into 'static/docs'
    }
}
1. 예제 소개 및 Test 코드 작성
@RestController
public class UserController {
    private final UserService userService;

    public UserController(UserService userService) {
        this.userService = userService;
    }

    @PostMapping("/users")
    public ResponseEntity<Void> join(@RequestBody UserRequest userRequest) {
        User user = userService.createUser(userRequest);
        return ResponseEntity.created(URI.create("/users/" + user.getId())).build();
    }
}
이번 포스팅에서는 회원가입 예제를 사용합니다.
Json형식으로 email, name, password를 전달하면 UserRequest로 바인딩되어 가입요청을 처리하고 다시 헤더 location 부분에 유저 아이디를 담아 응답으로 내려주는 과정입니다.
1.1 통과하는 Test 작성하기
@SpringBootTest
@AutoConfigureMockMvc
class UserControllerTest {
    @MockBean
    private UserService userService;

    @Autowired
    private MockMvc mockMvc;

    @Test
    void createUser() throws Exception {
        User user = new User(1L, "email@email.com", "홍길동", "1234");
        given(userService.createUser(any())).willReturn(user);

        String inputJson = "{\"email\":\"email@email.com\",\"name\":\"홍길동\",\"password\":\"1234\"}";
        this.mockMvc.perform(post("/users")
                .content(inputJson).accept(MediaType.APPLICATION_JSON_VALUE)
                .contentType(MediaType.APPLICATION_JSON_VALUE)).andExpect(status().isCreated());
    }
}
mockMvc를 이용하여 통과하는 Test를 만들어 주었습니다.
이제 이 Test를 활용하여 문서의 구성요소로 쓰일 snippets를 만들어 봅시다.
2. test를 활용하여 snippets 만들기
2.1 @ExtendWith(RestDocumentationExtension.class)
@ExtendWith(RestDocumentationExtension.class)를 추가해줍니다.
@ExtendWith(RestDocumentationExtension.class)
@SpringBootTest
@AutoConfigureMockMvc
class UserControllerTest {
    @MockBean
    private UserService userService;
    ...
}
2.2 mockMvc 구성
@BeforeEach
public void setup(WebApplicationContext webApplicationContext, RestDocumentationContextProvider restDocumentation) {
    this.mockMvc = MockMvcBuilders.webAppContextSetup(webApplicationContext)
            .apply(documentationConfiguration(restDocumentation))
            .build();
}
공식 문서에서 소개하고 있는 mockMvc구성 방법입니다.
2.3 문서에 기록할 내용 추가
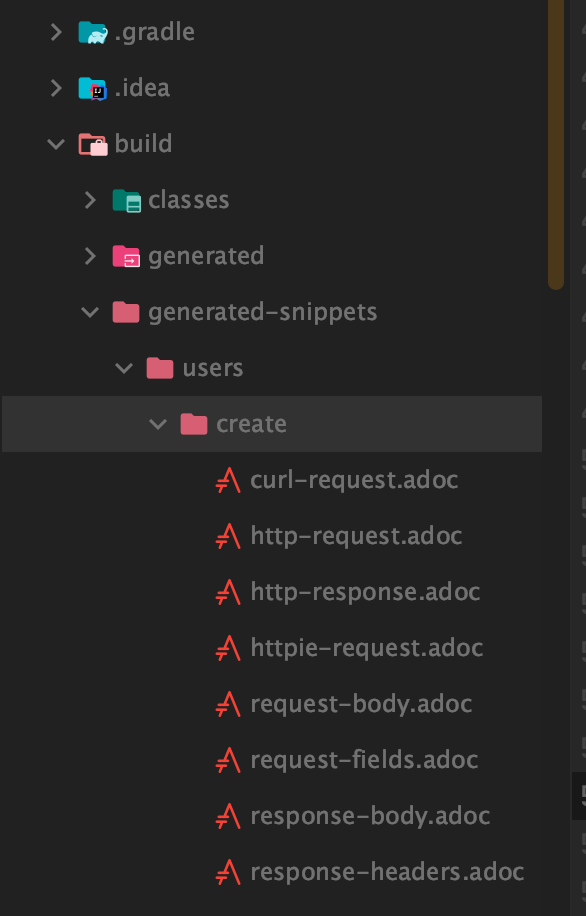
테스트코드에 문서에 기록할 내용들을 명시하여 추후 테스트를 실행했을 때 명시한 부분에 해당하는 snippets가 생성되도록 해줍니다.
@Test
void createUser() throws Exception {
    User user = new User(1L, "email@email.com", "홍길동", "1234");
    given(userService.createUser(any())).willReturn(user);

    String inputJson = "{\"email\":\"email@email.com\",\"name\":\"홍길동\",\"password\":\"1234\"}";
    this.mockMvc.perform(post("/users")
            .content(inputJson).accept(MediaType.APPLICATION_JSON_VALUE)
            .contentType(MediaType.APPLICATION_JSON_VALUE)).andExpect(status().isCreated())
            .andDo(createSnippets());
}

private RestDocumentationResultHandler createSnippets()
    return document("users/create",//1.
            //2.
            requestFields(
                    fieldWithPath("email").type(JsonFieldType.STRING).description("The user's email address"),
                    fieldWithPath("name").type(JsonFieldType.STRING).description("The user's name"),
                    fieldWithPath("password").type(JsonFieldType.STRING).description("The user's password")
            ),
            responseHeaders(
                    headerWithName("Location").description("The user's location who just created")
            )
    );
}- 추후 snippets가 생성될 경로입니다.
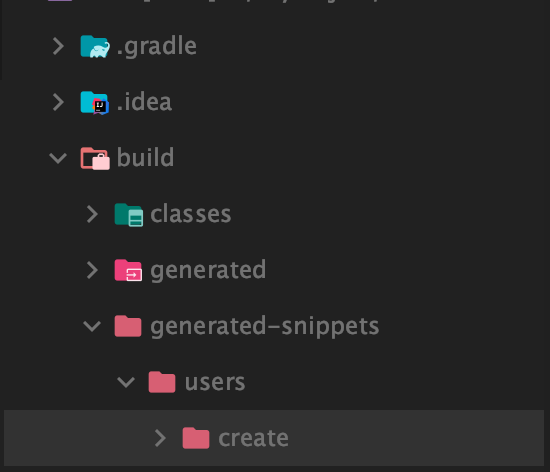
- 해당 내용을 기준으로 snippets가 생성되니 필요한 정보들을 적어줍시다.
2.4 snippets 생성
이제 테스트를 실행시켜 snippets를 생성합니다.
3. snippets를 템플릿에 추가하기
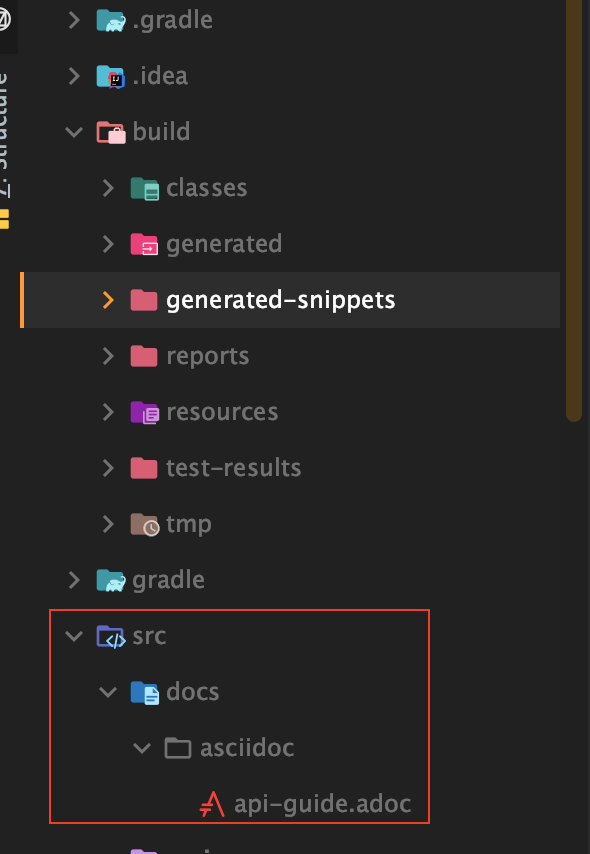
Src > docs > asciidoc 경로에 api-guide.adoc 파일을 생성합니다.
ifndef::snippets[]
:snippets: ../../../build/generated-snippets
endif::[]
:doctype: book
:icons: font
:source-highlighter: highlightjs
:toc: left
:toclevels: 2
:sectlinks:
:operation-http-request-title: Example Request
:operation-http-response-title: Example Response
api-guide.adoc 파일에 기본값으로 위와 같이 적어준 후 snippets를 추가하여 문서를 구성해줍니다.
예시
ifndef::snippets[]
:snippets: ../../../build/generated-snippets
endif::[]
:doctype: book
:icons: font
:source-highlighter: highlightjs
:toc: left
:toclevels: 2
:sectlinks:
:operation-http-request-title: Example Request
:operation-http-response-title: Example Response

[[resources]]
= Resources

[[resources-user]]
== Member

[[resources-user-create]]
=== 회원 가입

//generated-snippets 경로에 있는 파일 중 문서에 포함시킬 내용을 입력해줍니다.
operation::users/create[snippets='http-request,http-response,request-fields']
4. html 문서로 만들기📜
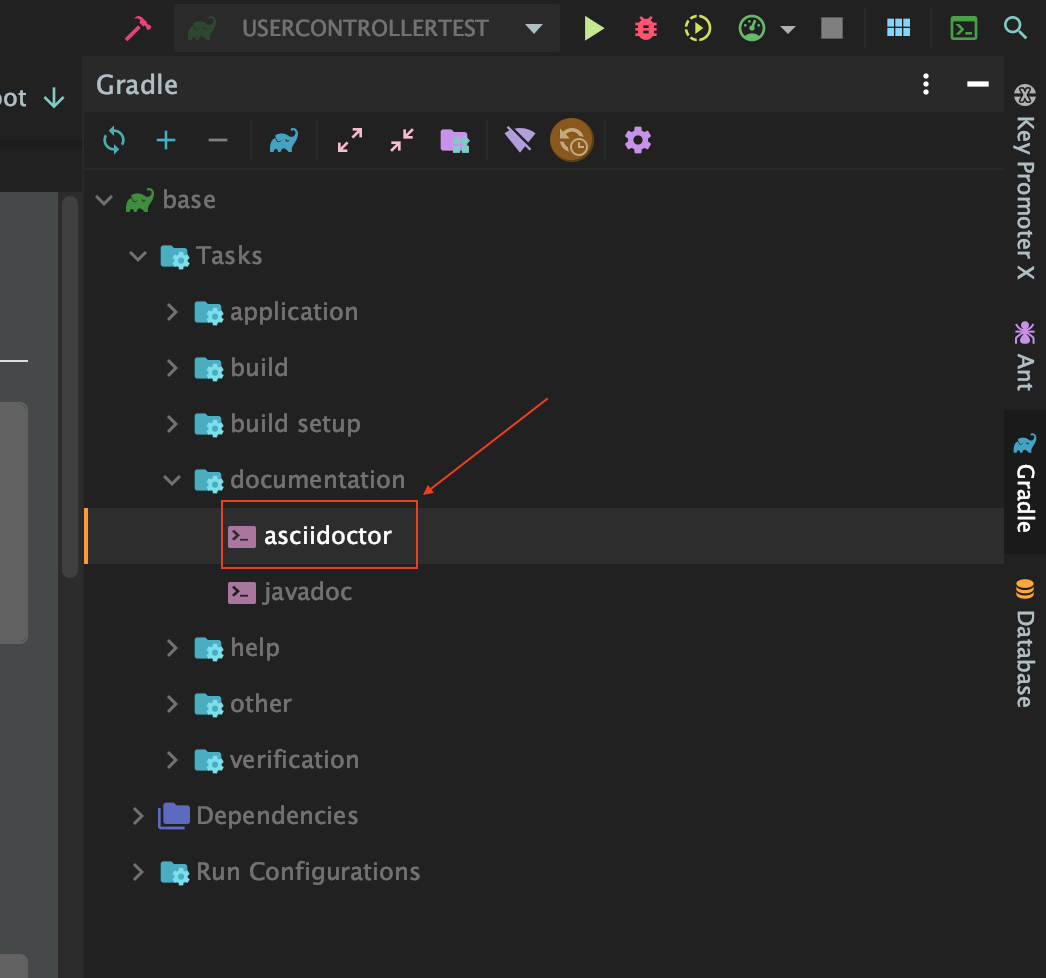
위 경로에 위치하고 있는 asciidoctor를 실행해주면 build > asciidoc > html5 경로에 api-guide.html 파일이 생성되는 것을 확인할 수 있습니다.
기본적으로 모든 test가 통과할 수 있는 상태가 아니면 문서화가 불가능하다는 점 참고❗️
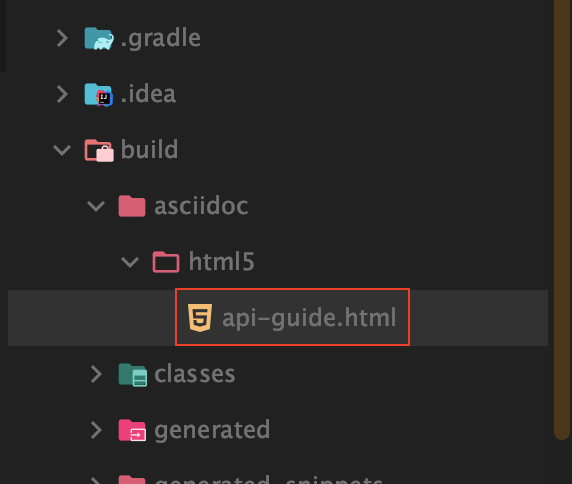
한번 확인해봅시다!🔎
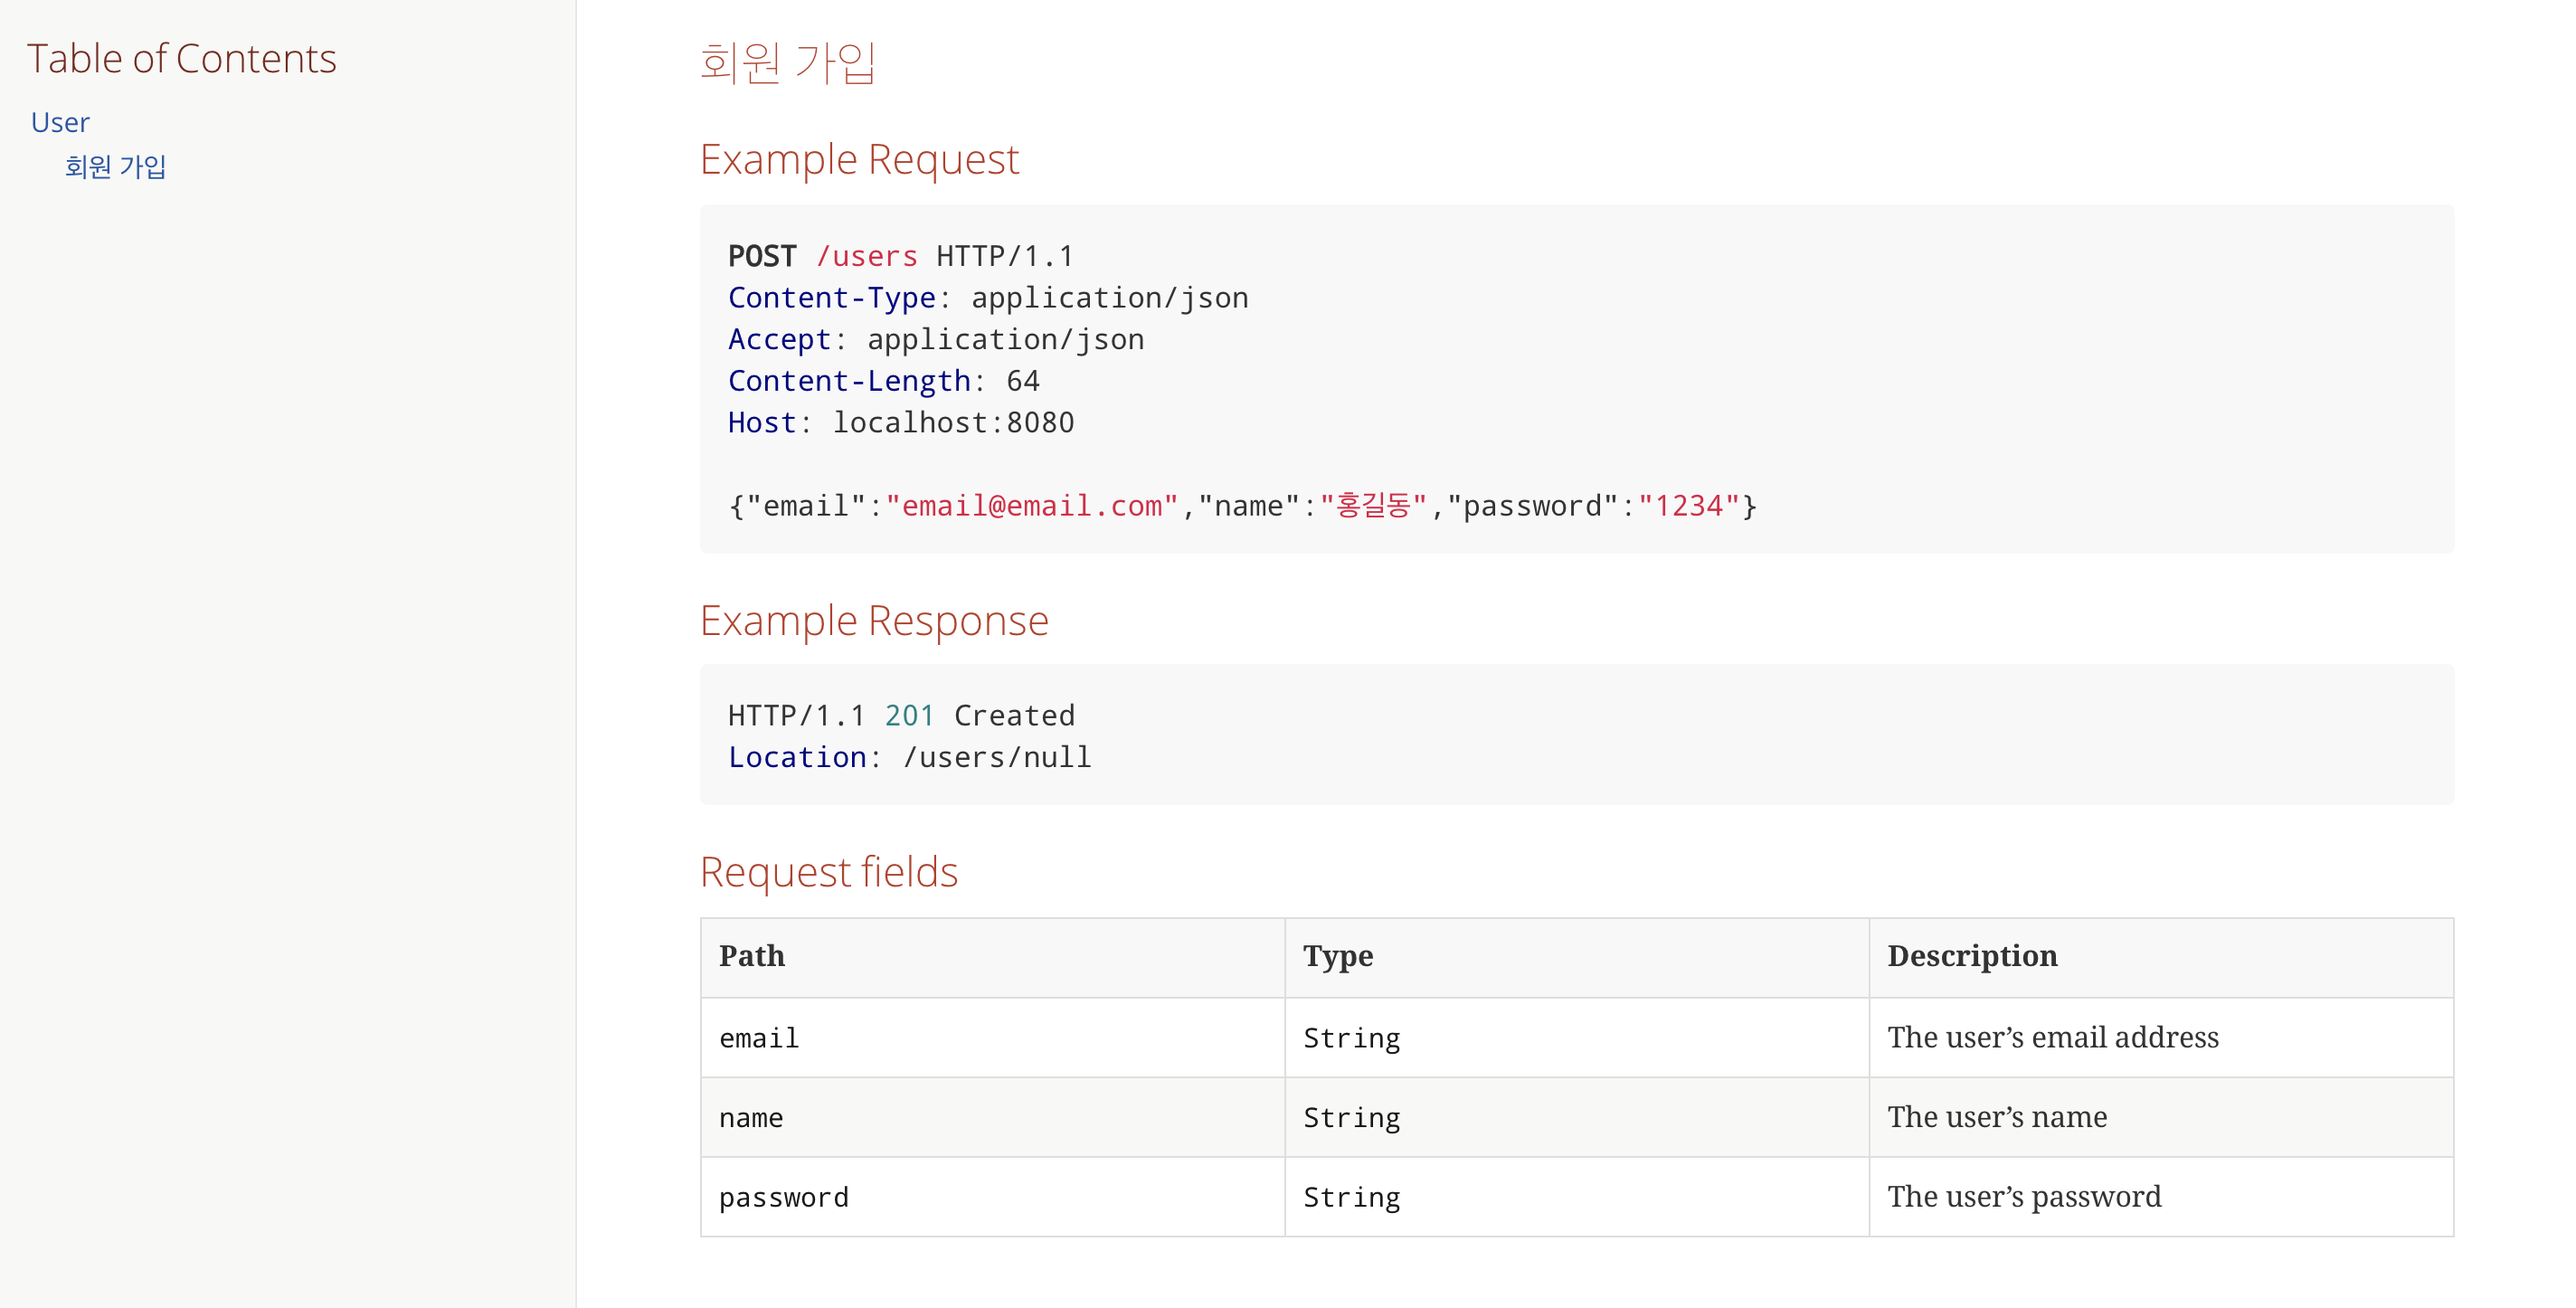
잘 작성된것을 확인하였습니다! 끗~!
'Spring' 카테고리의 다른 글
| JPA OneToMany 단방향 맵핑의 단점 이해하기 삽질기 (1) | 2020.07.23 |
|---|---|
| 스프링부트 / Fetch API를 이용하여 checkbox 다중값 백엔드로 전달하기 (1) | 2020.05.29 |
| 스프링부트 / JWT 방식으로 로그인 구현하기 (5) | 2020.05.20 |
| Spring / @RequestBody vs @RequestParam 이해하기 (6) | 2020.05.09 |
| 스프링부트 어노테이션 / @PathVariable (0) | 2020.05.01 |


